Here are common services for your reference (labour only):

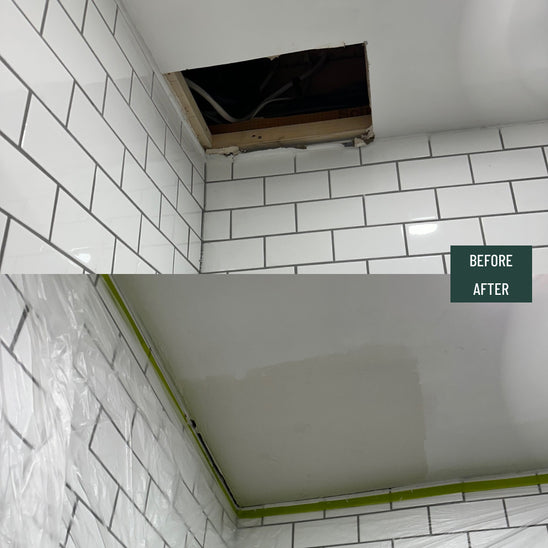
Drywall Repair & Hole Patching

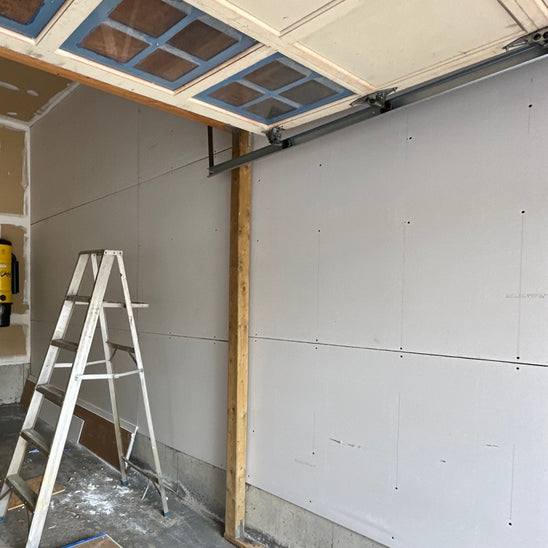
Drywall Installation & Finishing

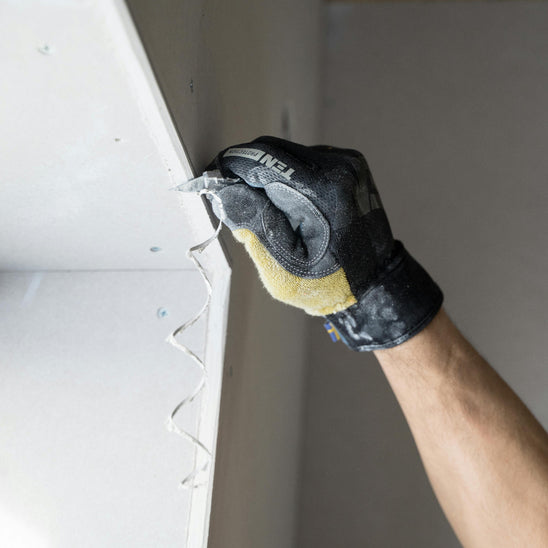
Specialty Drywall Services
Get a FREE Quote
Drywall Repair & Installation Services
Get a FREE no obligation quote:
Drywall Repair & Installation Services
Drywall is the base of almost every modern wall and ceiling.
Whether you’re building a new room, renovating your home or fixing holes from years of wear, quality drywall work means smooth surfaces and long lasting results. Drywall is the base of modern walls and ceilings so it’s the standard choice in most construction projects. As a handyman in Port Perry Ontario I provide drywall repair and installation services to homeowners and businesses in the area.
From replacing damaged panels to finishing joints with precision I handle every step of the process—measuring, cutting, attaching, taping and finishing—so your walls and ceilings look perfect again.
Why Drywall
Drywall (also known as gypsum board, wallboard or sheetrock) has replaced older building methods like lath and plaster because it’s faster to install, easier to repair and provides a consistent finish. It’s made of a gypsum core with a paper backing, available in different thicknesses and applications like moisture resistant boards for bathrooms. The form of drywall panels, like the shape and configuration of moisture resistant or fire resistant boards, is designed to meet specific construction needs.
Whether I’m working with half inch drywall sheets, lightweight panels or heavy duty wallboard the result is always the same: strong walls that provide insulation, fire resistance and a smooth surface for paint or repainting.
Pre-Installation Preparation
Proper pre-installation preparation is key to a successful drywall project. Before I bring in any drywall sheets it’s important to make sure the framing is solid and all electrical wires and pipes are in place and secured. This prevents damage during installation and ensures the drywall will sit flush against the studs.
Start by measuring the room carefully to determine how many drywall sheets you’ll need, considering the specific applications and thicknesses required for each area—like moisture resistant panels for bathrooms or thicker sheets for ceilings. Use a utility knife to cut the drywall sheets to size, making precise cuts for outlets, pipes and other obstacles. As you install secure the sheets with screws, making sure each screw is set below the surface.Once the panels are in place apply joint compound to the seams and screw heads to create a smooth surface. This is key to a perfect finish. Homeowners can find all the necessary materials and tools, from joint compound to utility knives, at local hardware stores like Home Depot. Taking the time to prepare will make the rest of the installation process smoother and more efficient.
The Drywall Installation Process
Professional drywall installation is more than just screwing a sheet to the studs. The plan begins by inspecting the framing, checking for wires, pipes and electrical wires that may run behind the walls. With careful measure and marking I cut panels with a utility knife or score and snap for clean edges. Drywall installation follows a specific sequence of steps to get the best results.
The process involves:
-
Measure the space to get accurate panel sizing.
-
Cut and snap the sheet to fit around studs, wires and both inside and outside corners. For outside corners corner beads are typically installed to protect and finish the edge.
-
Attach the panels to wood or metal framing with screws, no raised screw head.
-
Cover seams with joint tape.
-
Apply joint compound, feathering out the coat to blend with the surrounding surface.
-
Add additional coats of compound, sanding between coats for a seamless finish.
-
Final coat and sand for a smooth drywall surface.
-
Prep the surface for paint or repainting.
By following this process I help homeowners minimize waste, reduce cost and get durable and attractive finishes.
Drywall Installation Challenges
Drywall installation has its own set of challenges, from uneven studs to maneuvering heavy panels into place. Navigating around obstacles like electrical boxes or pipes can also be tricky. To tackle these issues it’s helpful to use specialized tools like a rotary cut-out tool for precise openings and to have an extra set of hands when lifting and positioning large drywall sheets.Measure accurately—especially when installing panels on ceilings or around fixtures. For example, measuring the distance from the center of a ceiling electrical box to the edge of the last installed panel ensures your cuts are spot on. Once the drywall sheets are attached use joint tape and apply joint compound to all seams. This minimizes visible seams and creates a smooth surface. With the right approach and tools even the toughest installations will result in a perfect finish.
Drywall Repair: Big and Small
Over time drywall can develop cracks, dents or holes. Whether from moving furniture, water damage or worn joints repair is essential to restore the integrity of your wall.
My drywall repair services include:
-
Patching small nail holes or a single dent.
-
Larger patching jobs that require cut-out and replacement panels.
-
Reinforcing damaged corners with metal or paper bead.
-
Sealing and finishing around electrical wires or pipes.
-
Smoothing seams with joint compound and joint tape.
When I apply joint compound I work in multiple thin layers, allowing each coat to dry before adding the next. Sanding each layer keeps the surface flat, and careful attention to edges ensures the repair blends with the surrounding wall.
Textured Drywall Repair
Repairing textured drywall requires a careful approach to ensure the new patch blends seamlessly with the existing wall. Start by applying a thin layer of joint compound over the damaged area, using a putty knife to spread it evenly. To recreate the original texture use a texture spray or a stomping brush, matching the pattern as close as possible to the surrounding surface.
Allow each coat of compound to dry completely before sanding lightly to get a smooth transition. To minimize waste and reduce cost measure the repair area accurately and apply the compound in thin even coats, building up the texture gradually. This method reduces material waste and helps create a repair that’s almost invisible once painted.
Tools and Materials I Use
Drywall requires the right tools and materials.
I use:
-
Utility knife and drywall knife for cutting and spreading compound.
-
Drywall screws and drill for attachment.
-
Joint tape and paper for seams.
-
Joint compound for finishing.
-
Sand blocks and pole sanders to smooth the surface.
-
Panels in various thicknesses for specific applications.
-
Gypsum board with paper backing for standard installation.By using the right tools and materials I get every job to a strong finish.
Corners, Joints and Edges: The Details Matter
A perfect drywall surface is all about the details. Joints must be taped, seams smoothed and corners reinforced.
I take the time to:
-
Inside corners are sharp and straight.
-
Outside corners are beaded for durability.
-
Edges are clean and gap free.
-
All screw heads are compound and sanded smooth.
The result is a wall that looks seamless, strong and ready to finish.
Cost
The cost of drywall work depends on the size of the job, number of panels and whether you’re repairing or installing. While material costs like gypsum, joint compound and tape are relatively cheap, the main cost is labour.
By working locally I help clients in Port Perry manage their costs effectively, I provide clear estimates before I start and each job includes a breakdown of materials, time and finishing so you can budget with confidence.
Common Drywall Situations
Drywall is in every room—from kitchens to bathrooms to basements. Some rooms like bathrooms and laundry rooms require moisture resistant drywall to prevent mold and water damage.
Some common situations where I can help include:
-
Water damage around pipes or appliances.
-
Crumbling plaster walls that need to be replaced with gypsum board.
-
Large holes from old fixtures.
-
Updating walls when running new electrical wires or wires for technology.
-
Replacing damaged panels in ceilings.
No matter the situation I can get you strong, durable results that look brand new.
Troubleshooting
When issues arise during drywall installation, quick troubleshooting can get your project back on track. Uneven seams are common and often caused by irregular framing or not enough joint compound. To fix this check the studs are secure and evenly spaced then apply an extra layer of joint compound and smooth it out with a putty knife for a level surface.
Cracks in the drywall surface can be caused by settling or poor installation. Check the framing to ensure it’s stable then use joint compound to fill and reinforce the cracked area, apply in thin layers and let each dry before sanding. By addressing these issues as soon as they appear homeowners can minimize delays and get a smooth durable finish for their walls and ceilings.
Why Choose My Drywall Services?
Unlike big box contractors I provide hands on personalized service. Every job I do is done with care, the right tools and a focus on quality. I work with gypsum, paper and compound daily so I know how to minimize mistakes and maximize durability.
I offer:
-
Clear communication and planning.
-
A perfect finish every time.
-
Solutions for both repairs and full installation.
-
Local knowledge of building styles in Port Perry and surrounding areas.
Patching
For many clients patching is the most common drywall request. Whether it’s small holes from hanging photos or larger sections cut out for electrical wires, patching gets the wall back to a smooth surface.
Patching involves:
-
Cutting a replacement sheet to size.
-
Attaching it to nearby studs with screws.
-
Taping the seams.
-
Applying compound to blend the repair.
-
Applying multiple coats and sanding between each layer.
With careful reference to the original surface the repair disappears and there’s no sign of the damage.
Drywall Panels and Thicknesses
Drywall panels come in many thicknesses, each for specific applications:
-
1/4-inch sheet for curves or overlays.
-
1/2-inch panels for most residential walls.
-
5/8-inch gypsum for fire resistance and ceilings.
By choosing the right thicknesses I get strength, durability and compliance with building standards.
Sanding and Finishing
The last step in any drywall job is sanding and finishing. After I apply compound I sand the surface, smooth edges, joints and corners. Each coat must be feathered wider than the last to create a seamless transition.
A good finish requires patience: sanding, wiping down paper dust and applying another layer of compound if needed. Once complete the wall is smooth and ready to paint.
Avoiding Common Mistakes
Avoiding common mistakes during drywall installation can save time, money and frustration. One common error is not applying enough joint compound to the seams which can leave visible lines and an uneven finish. Another is using the wrong type of drywall for the job—such as standard drywall in areas exposed to moisture, where a moisture resistant board would be more suitable.Homeowners can avoid these issues by consulting with professionals, choosing high quality materials and following established procedures. Using the right tools and techniques not only improves the finish but also saves labour and overall cost. Planning and attention to detail is key to a professional result.
Access, Permission and Reference (Keyword Integration Section)
In every job there are steps where access matters. I often need permission to enter a property and I keep detailed reference notes of what needs to be patched. Sometimes access denied issues come up when scheduling but with clear communication I ensure clients are comfortable throughout the process.
In technical terms I treat each server of information like a wall system: I check where access is possible, note where access is denied and then plan accordingly. I treat “permission to access http” as a mindset: the idea that clear steps and open communication prevents delays.
From patching to finishing I keep full reference notes. If a server or “http” connection metaphorically fails I resolve it quickly. This structured approach ensures every job runs smoothly from start to finish.
Port Perry and Surrounding Areas
I serve Port Perry, Ontario, and the surrounding areas. From historic homes in downtown neighborhoods to newer builds along Lake Scugog I provide drywall services that respect the character of each property while bringing modern durability.
Strong, well-finished drywall is the key to beautiful, functional spaces. From patching small holes to installing full panels of gypsum board, I bring the experience, tools, and dedication to get the job done. Whether you need to patch a small dent, finish a basement, or start a large renovation project, I’ll be with you every step of the way.
With precise measure, careful installation, and attention to finish, your walls and ceilings will be ready for paint, decor, and years of everyday use.
Drywall Repair and Installation Services in Port Perry—for flawless walls, lasting durability and workmanship you can trust.
FAQs About Drywall Repair & Installation Services
get a Drywall Repair & Installation quoteOur drywall services cover everything from small crack and hole repairs to full wall and ceiling installations. We handle framing, taping, mudding, sanding, and finishing for a seamless, paint-ready surface.
Yes! Our team specializes in texture matching for both repairs and additions. Whether you have smooth, knockdown, or popcorn finishes, we blend new drywall perfectly with existing surfaces.
Most drywall installation projects take 1–3 days depending on the size, number of rooms, and drying time between mudding and sanding. Larger or multi-room projects may take slightly longer.
Absolutely. We repair and replace ceiling drywall affected by water damage, cracks, or sagging. Our experts ensure the repaired area is level, secure, and ready for paint or texture.
Yes, we provide professional drywall repair and installation for both residential and commercial spaces across Durham Region, including Port Perry, Uxbridge, Whitby, and Ajax.